Published on Wednesday, 23 May, 2018
Blueprinting
 Sally Lait
May’s ‘12 months of digital transformation’ post is about a staple in the toolbox of change: blueprinting. This month we’re going to look at what it is, what it can help with, and how you can do it effectively.
Blueprinting (or ‘service blueprinting’), like many valuable techniques that we use in modern day transformation has been around for a while now — Wikipedia lists it as being first described by G. Lynn Shostack in Harvard Business Review in 1984. With the rapid rise of service design (designing services for people, across all of the different channels that they use) as An Important Thing within the digital industry over the last few years, we’ve seen more and more people building blueprints into their processes, including many of the projects that I work on.
Whilst this topic has been covered in depth and extremely well by many parties, I think that it’s an activity that’s not necessarily as visible or accessible to those who perhaps don’t have the budget or situation for an agency to help them. I therefore wanted to include this in my series so that it can be a reference for those who may not have come across it before, and who may want to use some of the techniques for themselves. But first, what are blueprints?
What is a blueprint?
At their core, blueprints are a ways of capturing the steps of an end-to-end scenario, along with insight about exactly what’s happening, and what could be better. Their ultimate goal is to be used as a tool to see what’s happening now, but to also present a view of actionable change for the future.
They differ from customer journey maps in that they’re not exclusively focused on just the customer perspective, and instead capture not only the direct touchpoints but also everything else that happens ‘behind the scenes’ in order to facilitate those interactions. They’re also not just focused on the web, and include a lot of other factors that we’ll cover when we walk through shortly.
That’s exactly one of the reasons that I particularly like them. They marry the process flows of what different people are experiencing, with a view of the technology in play, and everything else that needs to happen to make it work. As someone who’s still heavily focused on the technical side of things, I love the opportunity to have that information directly surfaced alongside the impact on people. Got a really terrible legacy system that’s incredibly slow and is causing friction? Yep, that’s going to show up. Got some manual steps that could be streamlined? That’ll be easy to see too. Does a person have to jump out to do a task in another system, or go and open up a separate app that’s completely siloed? You get the idea.
I find that they provide a very well-rounded view, make it easy to understand where there are gaps or where things aren’t working, and give clear direction for the future.
By blueprinting, we can gain a holistic view of the end-to-end process both at a high level and in detail at the same time, and to use it to find opportunities.
What kind of things can they focus on?
Any kind of process that you feel may need some attention is ripe for blueprinting. These processes and interactions don’t need to be digital, and also don’t need to involve just customers in a B2C sense. Here are some real examples to show you the kind of range:
- A charity, looking at the process of customer donation.
- A shipping company, who needs to schedule an outbound shipment from their warehouse, manage stock, log the driver turning up, pick and load the product, and send it away.
- An energy company reviewing the process that a customer goes through to switch the plan that they’re on.
- An application and interview process.
My work is increasingly about helping people who don’t have huge, existing in-house teams to navigate what it means to look for opportunities. I often use blueprints as a way to get people with different areas of focus to think both tactically and strategically about what they’re doing, and to collaboratively discuss where the opportunities for improvement are. I then help them learn about different capabilities that technology may offer, whilst also challenging that tech may not always be the best approach.
Creating your own blueprint
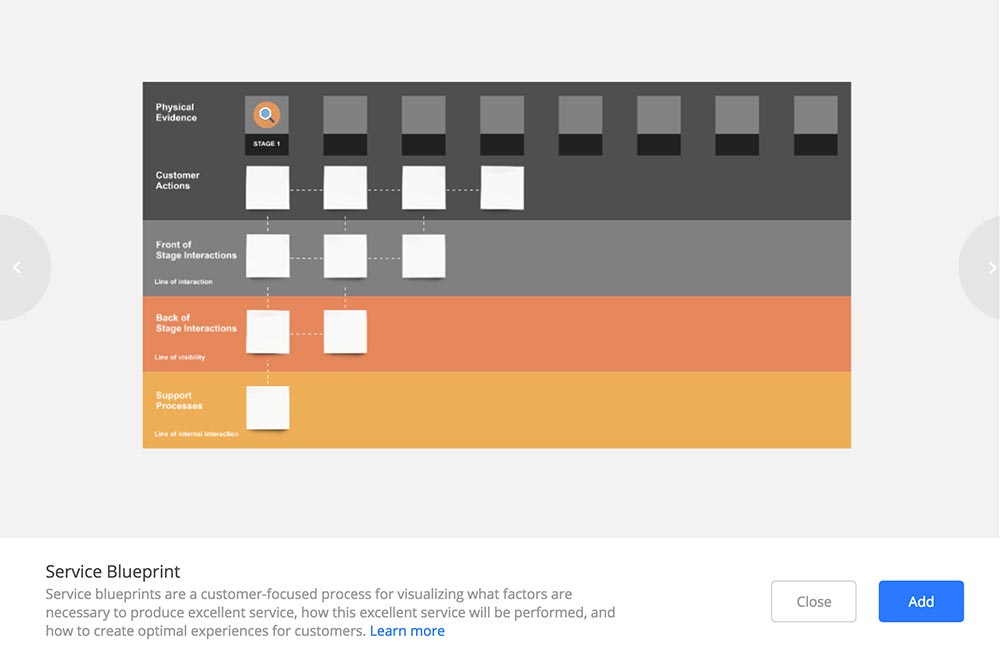
Everyone has their own particular way that they like to lay out a blueprint, and if you delve deeper into the resources at the end of this post you’ll be able to see a range of different approaches. As always, I’d encourage you to think about what works best for you situation, however as a starting point here’s a typical framework that I like to use.
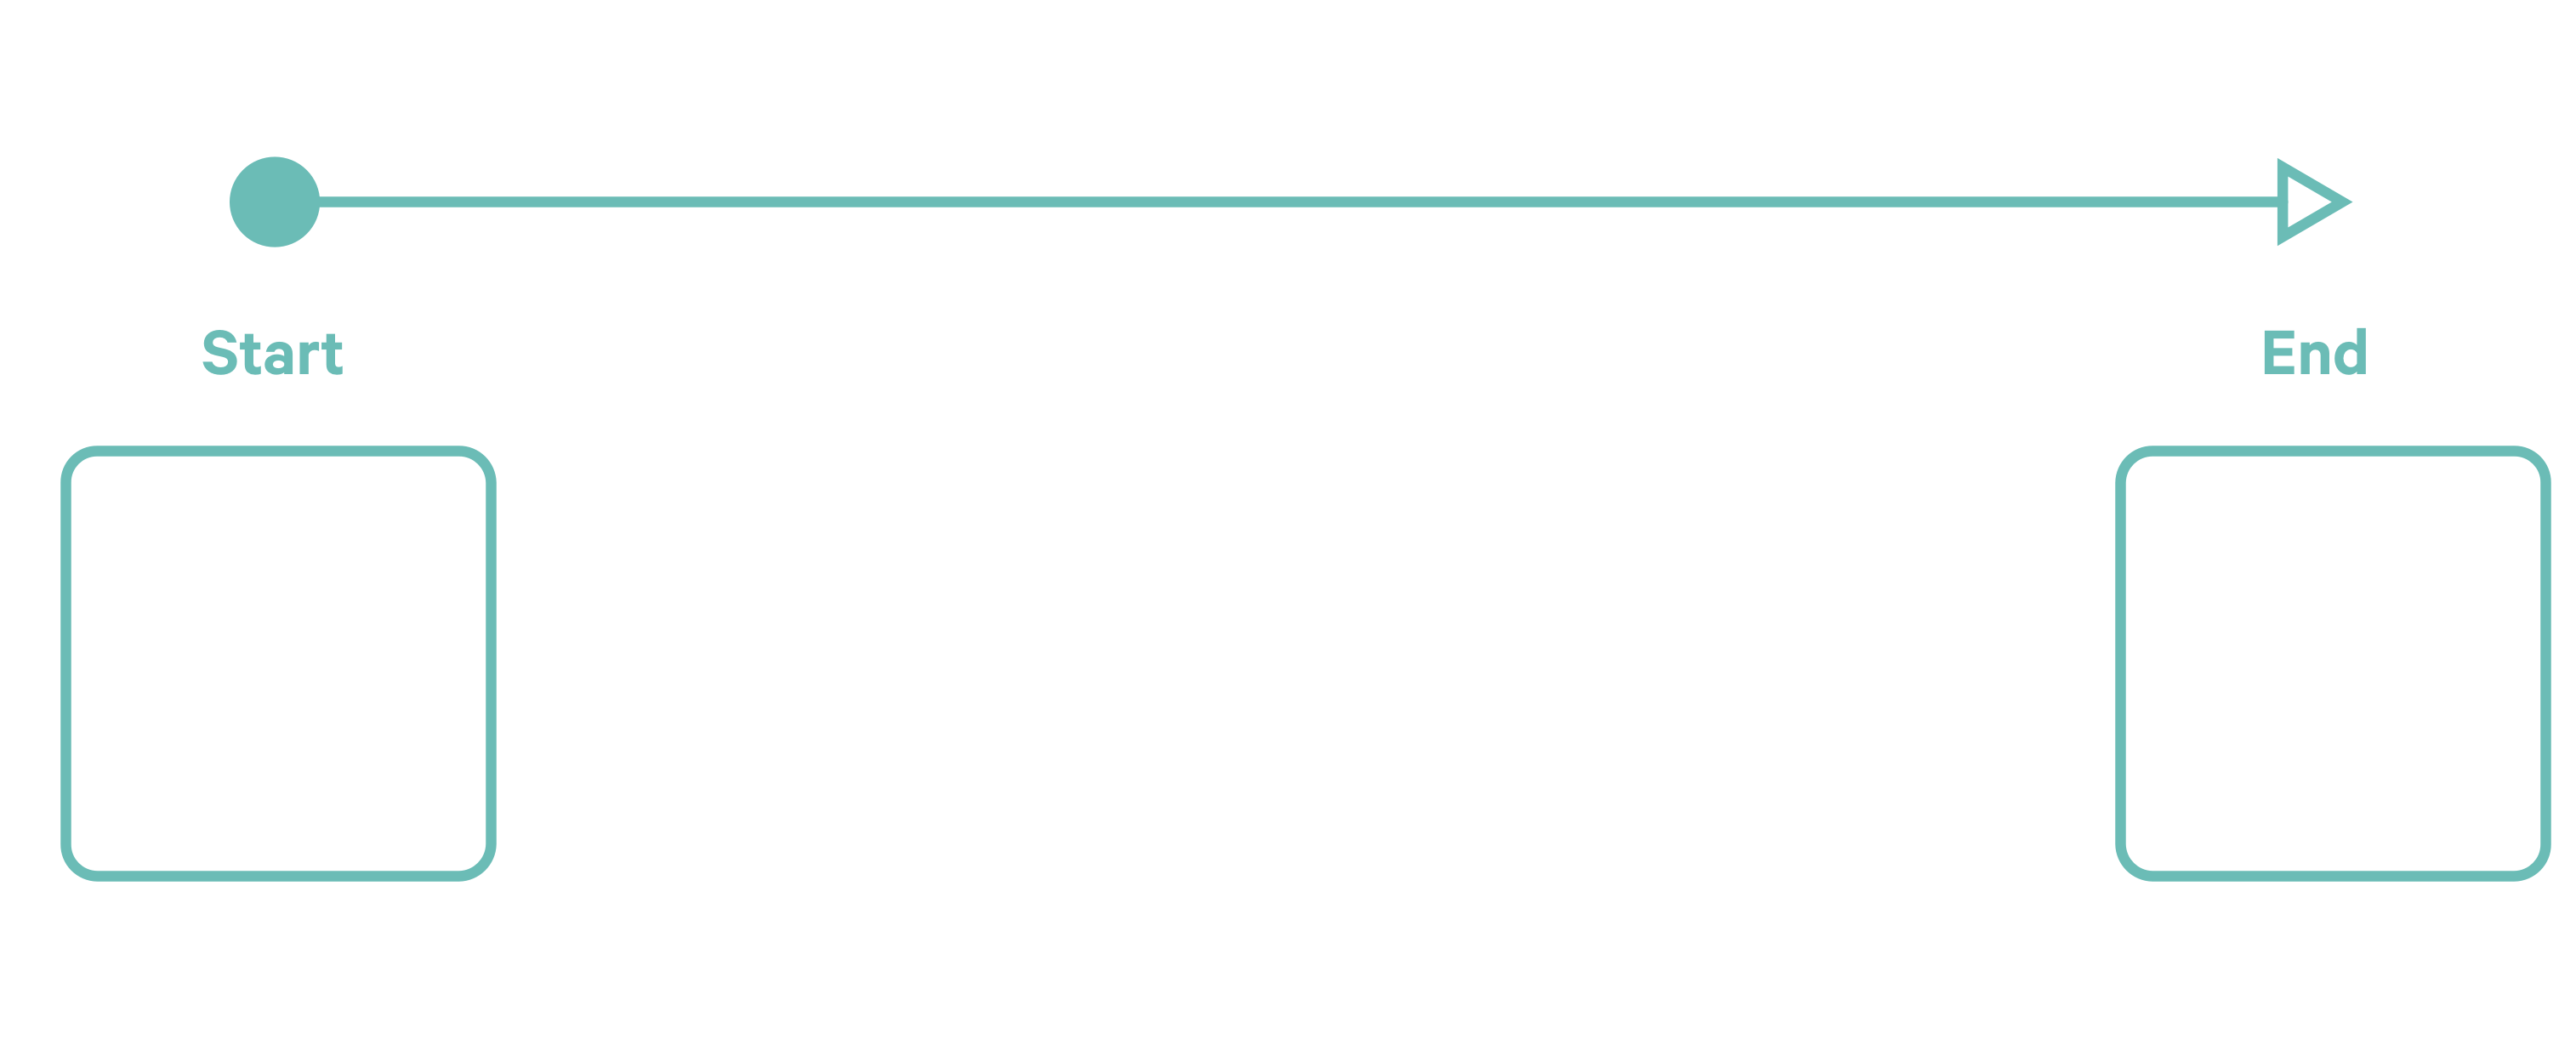
1. Think about the scope of the problem that you want to investigate
You should ensure that you’re not tackling too much at once, so for instance whilst the following is an end-to-end customer lifecycle, you may well want to split it into individual blueprints.
e.g. A person becoming aware of a service, researching, signing up to it, managing their details, and eventually leaving the service, could all be split into separate activities.
What are the start and end points of the particular scenario that you’re looking to focus on?
2. Think about who to get in a room
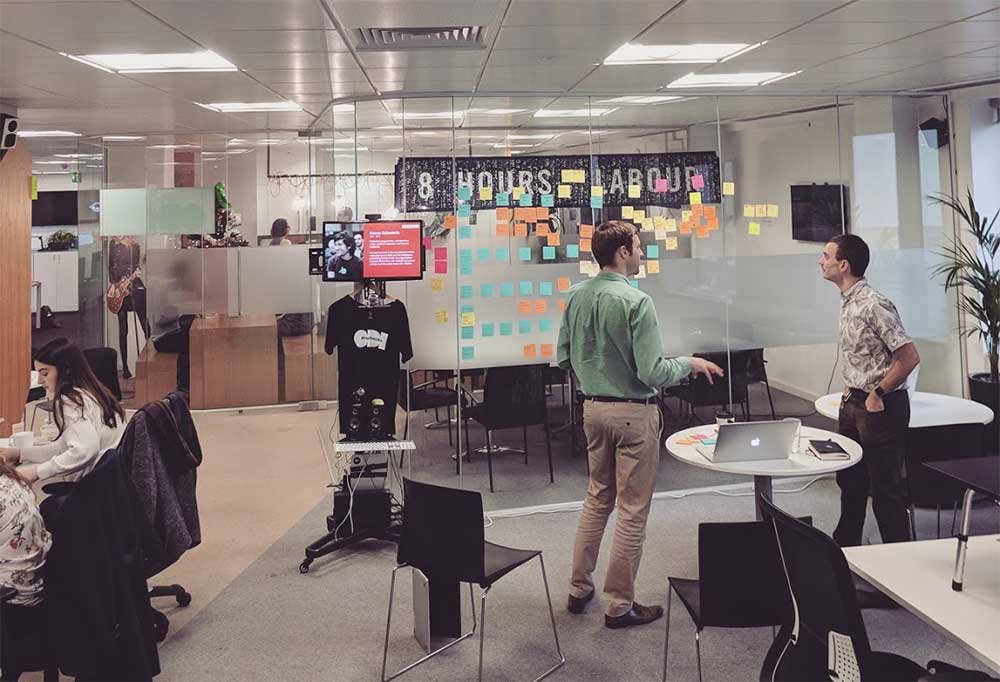
Ensure it’s a diverse team, including those who represent customer insight, and an understanding of the systems; people who hear about frustrations, and those who can evidence what’s important; people who are focused on customers, and those who care about business impact; those on the front-lines of interaction, and those behind the scenes.
Who’s on your team?

3. Work out the medium that you want to work in
Very often the old post-its on walls approach works best for this, as it allows for collaboration and gets people standing up and active rather than passive. However this may not be possible if you don’t have everyone physically co-located, or don’t have space. In this case it’s also possible to work using online tools (see references at the end).
How will you be creating your blueprint?
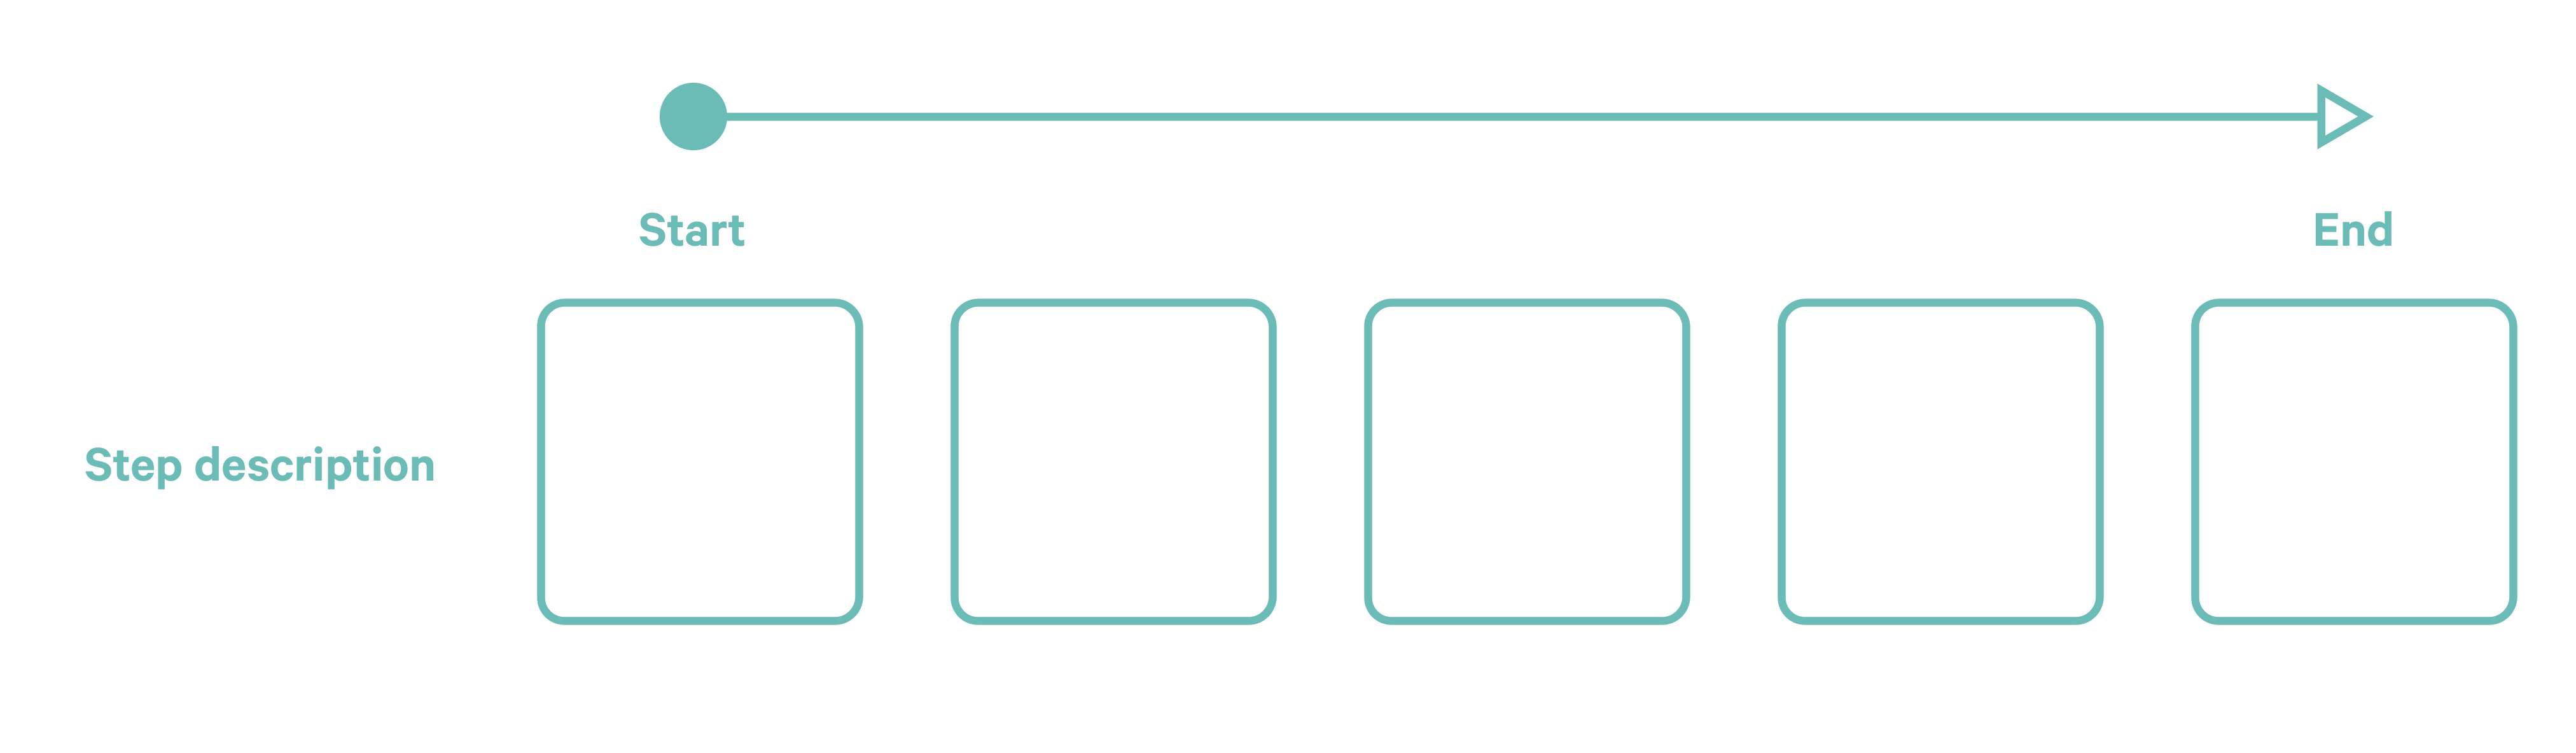
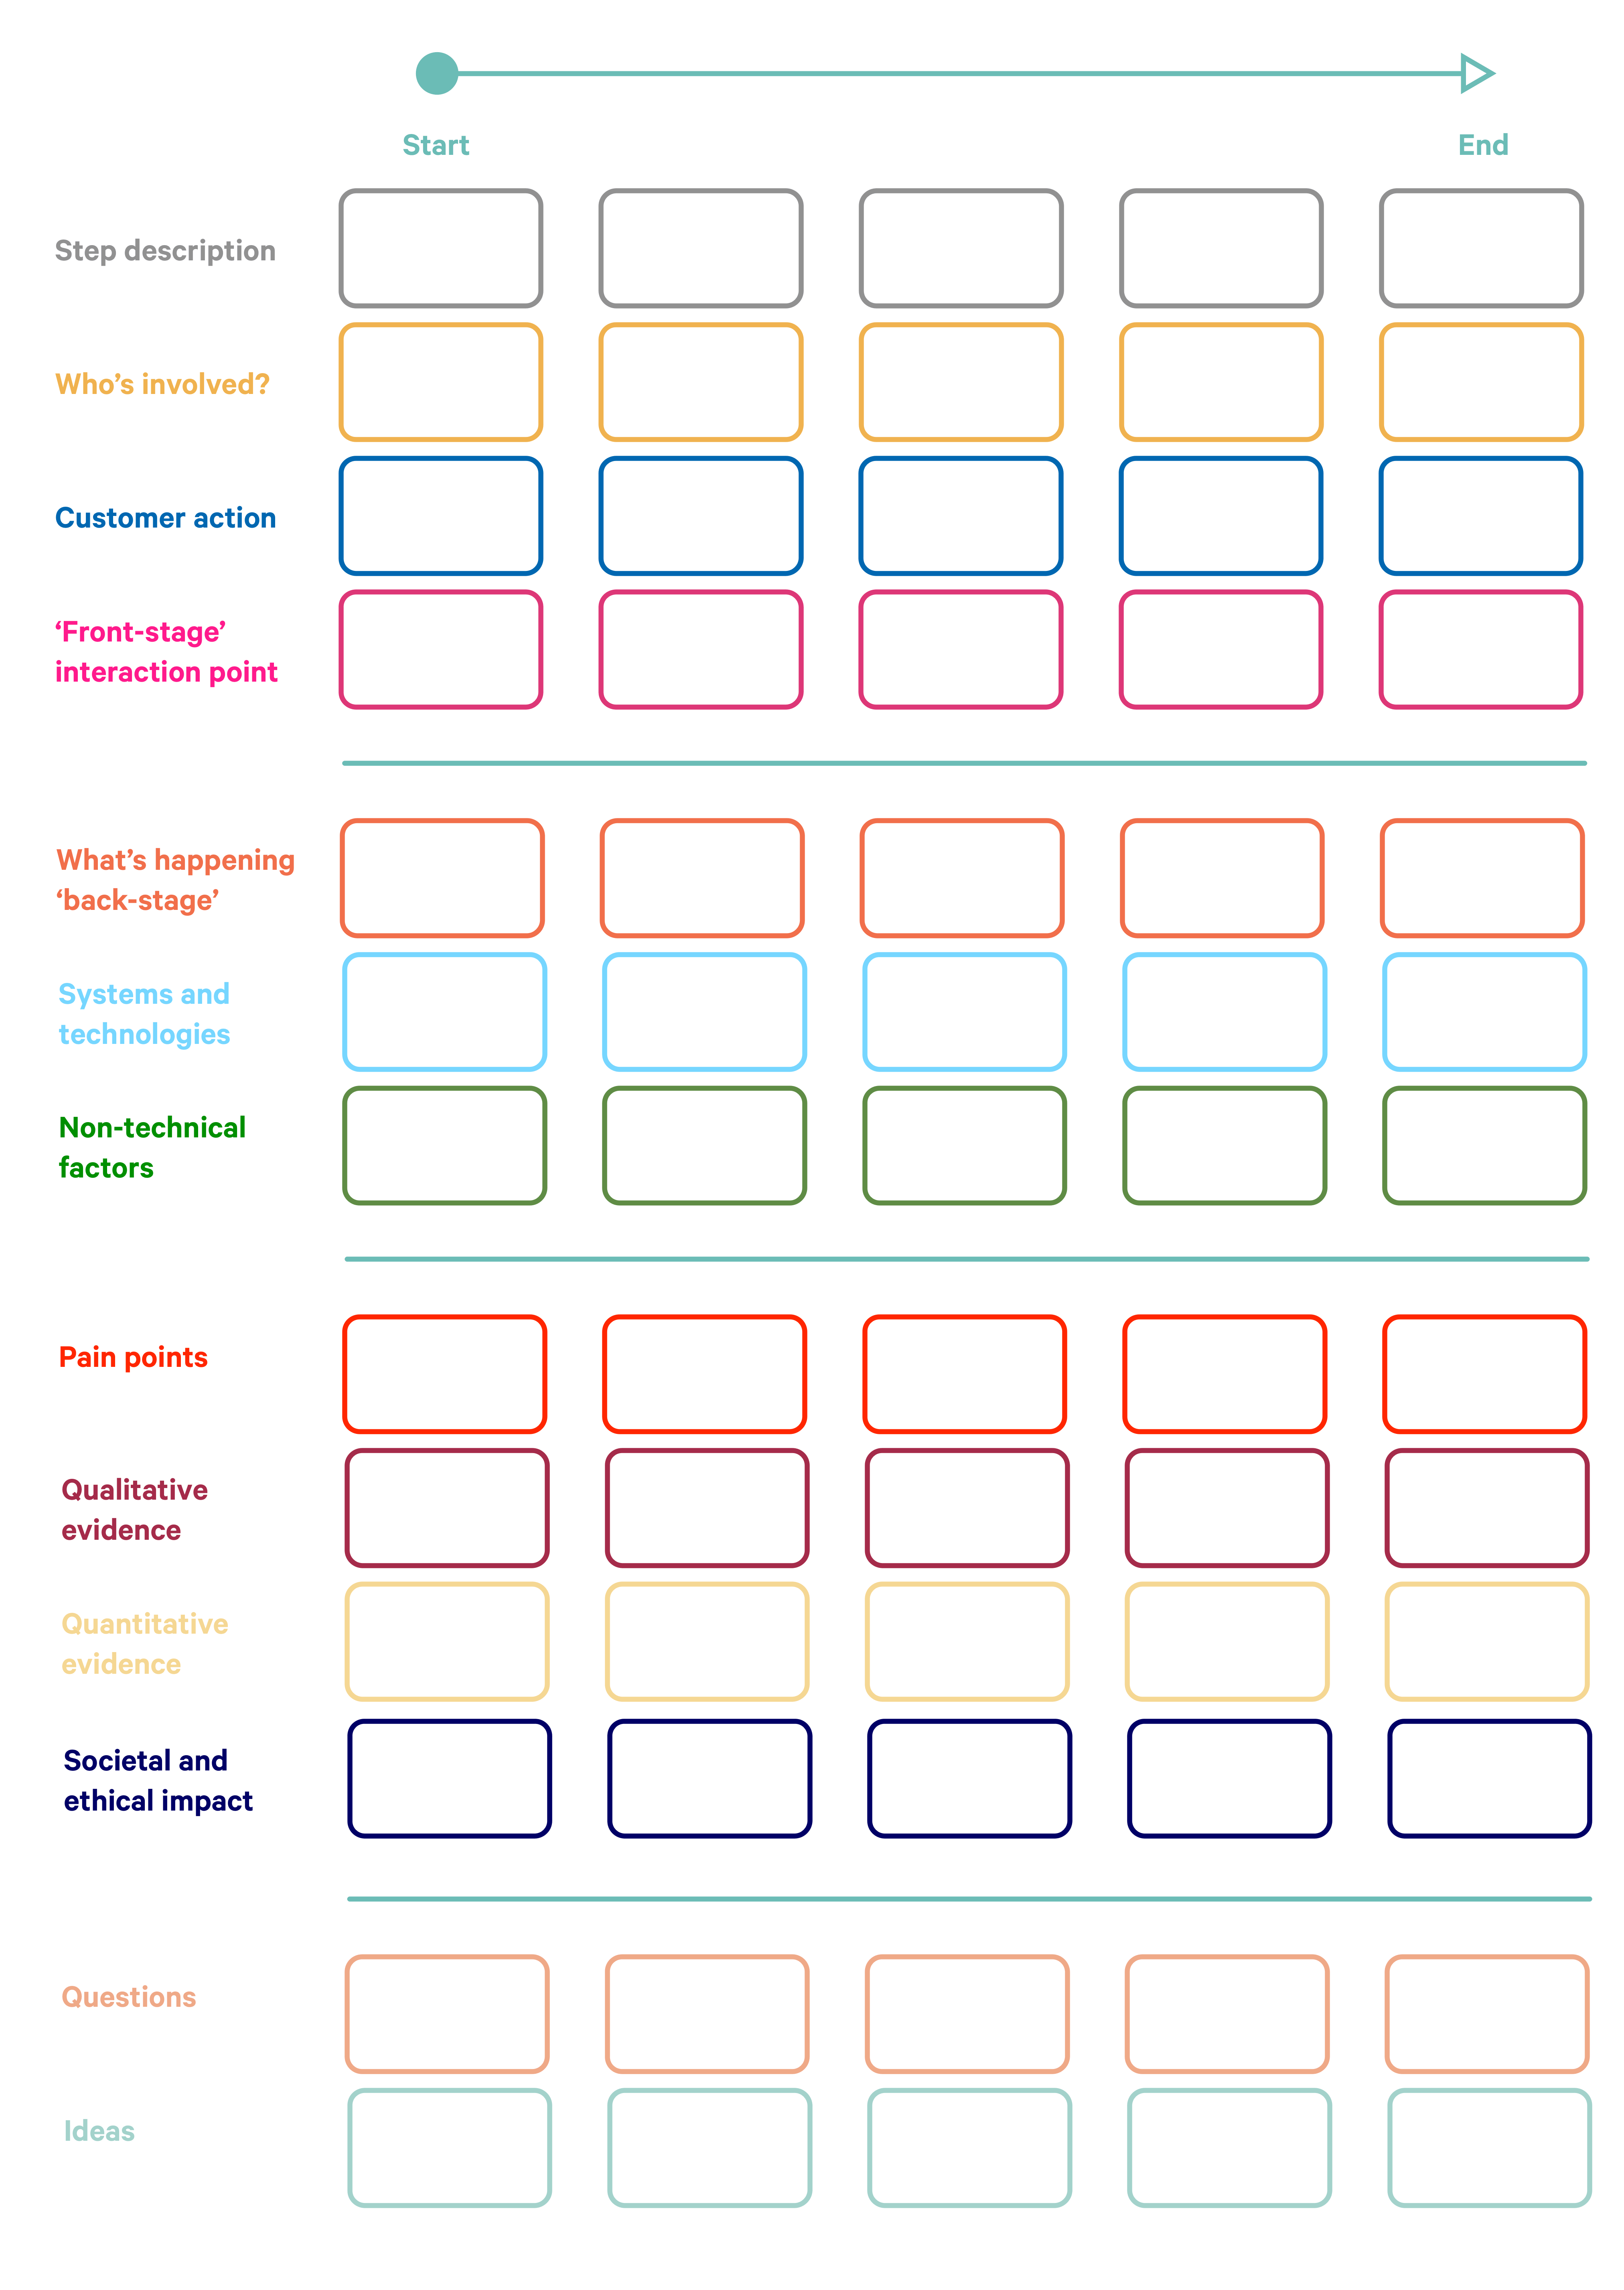
4. Plot out the steps in the particular end-to-end scenario that you want to focus on
Write these horizontally between your start and end cards. For each point in between your start and end points, think about capturing:
- A one-line description of what this step is. Make sure that this is easily understandable (avoid jargon!).
Some people prefer to identify each step and fill in the details for it as they go, but I find that it’s often better to focus on getting a very clear view of the scope by starting with just the steps.
Fill in the top level steps
5. Fill in your blueprint
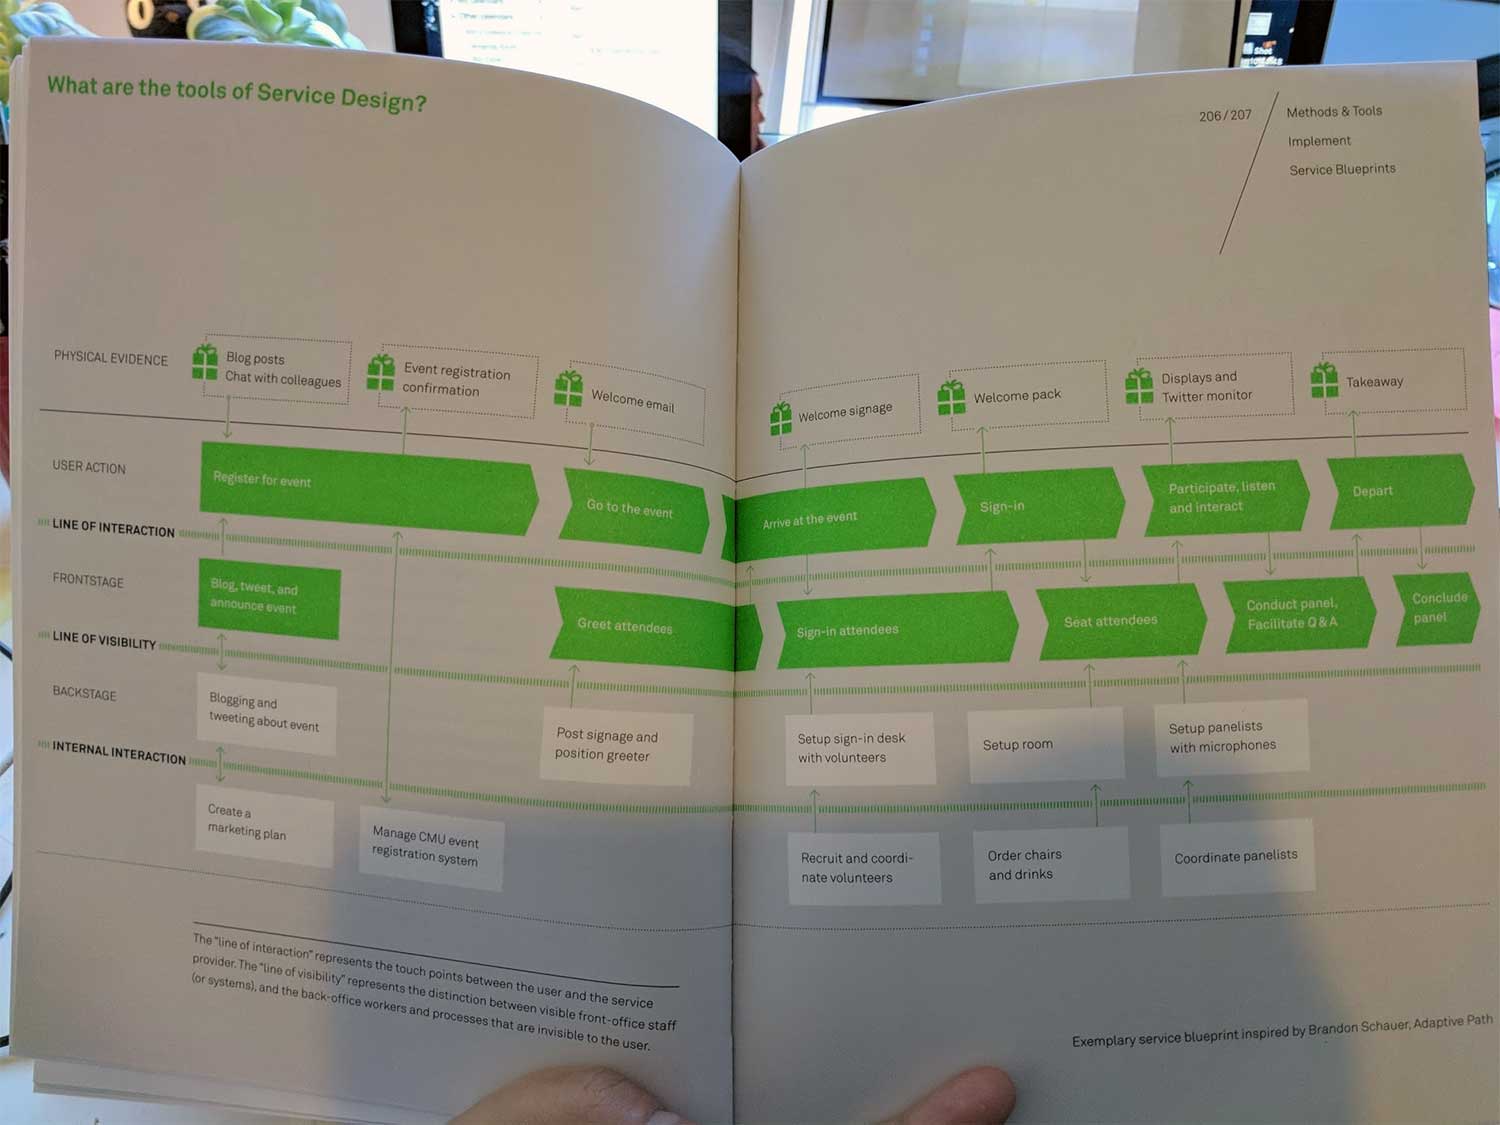
Under each step’s one-line description, include the following. I can recommend colour coding these, or having them in very clear individual swim lanes. You may have more than one card in each section, or no cards - for instance there may be a number of pain points or none.
The factual bits
- Who’s involved
- Customer actions
- What they interact with ‘front-stage’ - the touchpoints, interfaces, or people that the customer interacts with directly.
- What happens ‘back-stage’ - what happens internally, behind the scenes to facilitate this.
- What back-end systems or technologies are involved to support this step.
- What other non-technical things underpin this (e.g. compliance rules, budgets, policies etc).
Evidence or observations
- Pain points that we know about
- Qualitative or anecdotal feedback that we’ve heard
- Evidence, or data that we have around each step (you may want to include things like the time that it takes, or how many people it affects)
- Society and ethical impact
Further discussions
- Questions, or parked areas to explore further
- Ideas for opportunities and improvements
That’s a lot of cards! For quicker run throughs you may wish to keep it a bit more streamlined, focusing just on the factual bits and pain points. You’ll find that conversations naturally come out of this activity, so ensure that you have a good facilitator who can keep everything on track.
6. Do something with the outcome!
The output here can be a really useful artefact in its own right, as it often makes a scenario accessible and digestible to people when it wasn’t clear before. However, don’t stop there! Book in a follow-up session (everyone will probably be flagging after creating this) to talk about the next steps, focusing on the pain points, your priorities, and to start putting improvements into your roadmap.
Resources
As I mentioned earlier, there are a ton of great resources out there on this subject. Here are just a few that could be useful to you, as well as some tools that you can use to create your own.
- Trello - a really useful collaborative card-based tool that works perfectly for blueprinting
- RealTimeBoard - another online collaboration tool, which includes a Blueprinting template
- Practice service design - a community, video tutorials, resources and more
- This is Service Design Thinking - the online home of a really practical and informative book
Read more from the blog
Back in time:
Finding enhancements
Posted by Sally Lait
Sally is the lead consultant and founder of Records Sound the Same, helping people with digital transformation. She's also a speaker, coder, gamer, author, and jasmine tea fiend.